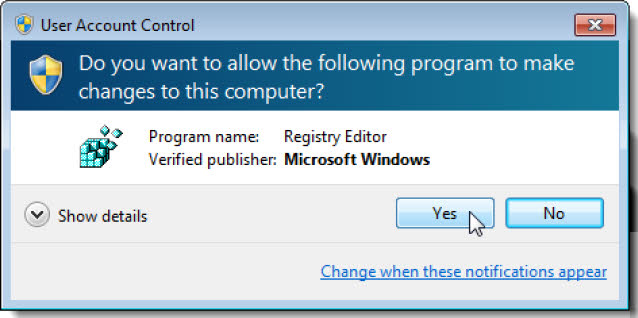
Starting from Windows Vista, Microsoft added a major security feature named User Account Control (UAC) which asks for administrative permission when a user tries to run an applications that may change Windows system settings, modify system files or similar kinds. UAC is designed to add extra security that makes a layer between programs and a standard user. It prevents unauthorized applications and commands from executing directly by prompting a dialog to the user. The dialog basically contains a Yes and No buttons. It may also ask for password if the administrator of the system set a password.
Problem with UAC
Even if you are the administrator of the system, UAC prompts are useful for you as it notifies you about a program’s system access that could harm your computer. Thus, completely disabling UAC shouldn’t be a good practice for most of all. The problem is, you wouldn’t like when you get UAC prompt every time you run a particular trusted application, where you don’t want global UAC disabled at all. This is just distracting. Because Windows has no direct option to disable UAC prompt for specific programs. No one would like UAC dialog for programs they use very often. This is also hateful when you added a program to Windows startup to make the it run with Windows when PC starts, and now every time you start your PC, it’s asking for Yes or No with UAC prompt. Hopefully, Windows has built-in workarounds to allow individual programs to run as administrator without UAC prompts.
You can disable UAC for particular trusted applications in several ways. The most common method is using Windows Task Scheduler which requires creating a shortcut to the executable. Another method that do not requires you create shortcut, involves using Microsoft Application Compatibility Toolkit which makes a programs run as admin without UAC prompt. I have also shown other third party tools that make the process more easier. I have illustrated the both manual procedures the make the steps easier and clear.
With Shortcut using Task Scheduler
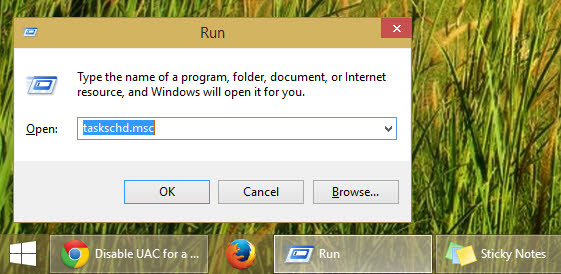
- Press Start+R to trigger Run window. Type taskschd.msc in Open field and hit OK to run Task Scheduler.
- Click on Create Task from left side.

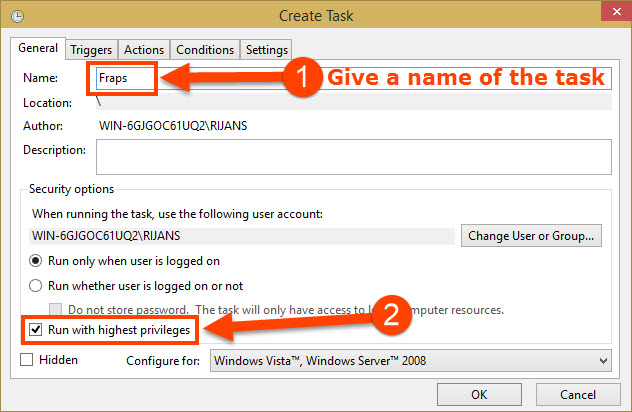
- In Task creator window, under General tab, type a name in Name (relevant to your application) field without any space inside it. And turn on Run with highest privileges.
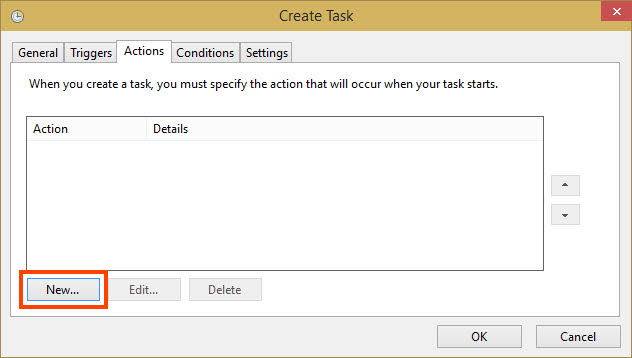
- Now go to Actions tab, and click New.
- Click Browse to locate the program. I located Fraps, a screen capturing tool for gamers. Then hit OK.
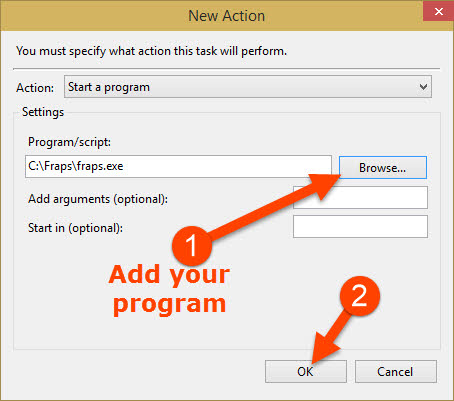
- Press OK on task creator too. Now you have add the program to Task scheduler that you can see listed in Task Scheduler Library. Now we need to create a shortcut to the program.
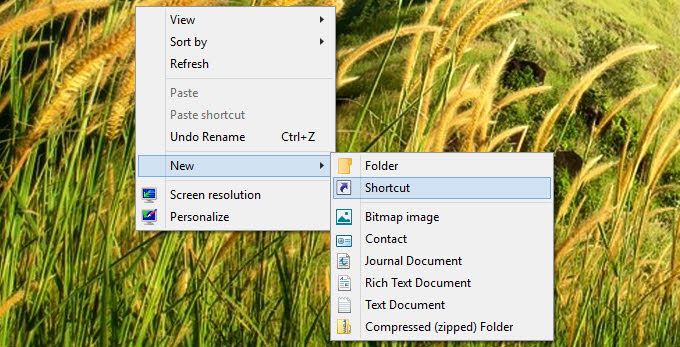
- Go to the location where you want to create your shortcut. Right-click there and choose Shortcut from New.
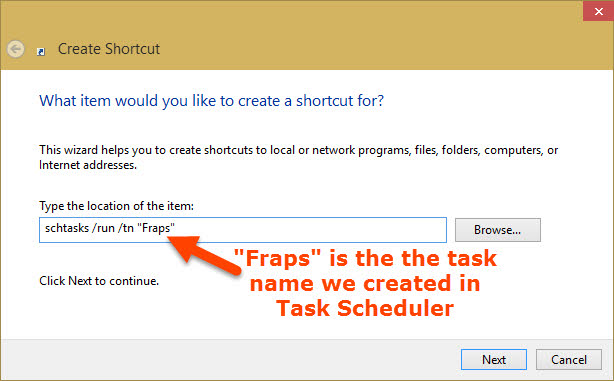
- In location field, type schtasks /run /tn “<task-name>” where the name in the double quotation should be exactly the task name you set in Task Scheduler. Go Next.
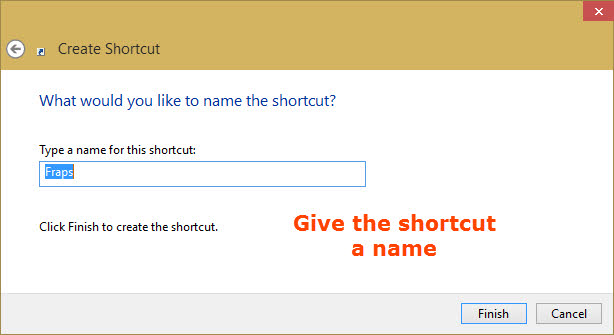
- Give a name to the shortcut that is relevant to the program. Click Finish.
- You have done creating the shortcut to the program that you want to run without UAC dialog.

- That’s it.
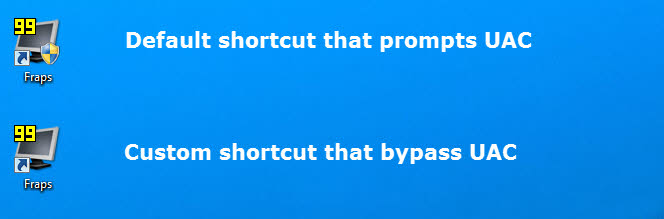
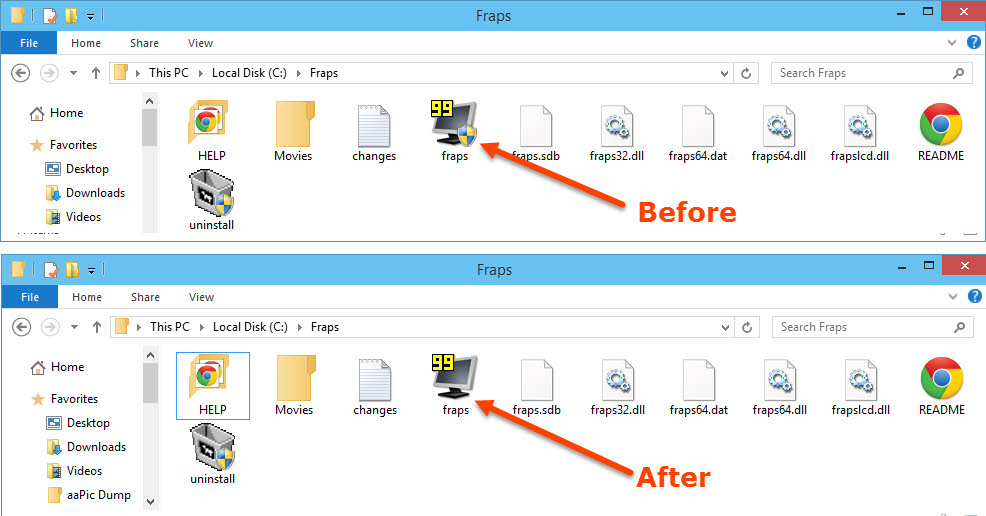
Note: As the shortcut doesn’t have appropriate icon, you can set corresponding icon by right-click > Change Icon > Locate an Icon or the target program. If you choose the program for icon, the shortcut’s icon will be replaced with the program icon.
![]()
Here’s the default shortcut to my application Fraps and the custom shortcut that doesn’t trigger UAC pop-up:
Without Shortcut using Microsoft Application Compatibility Toolkit (ACT)
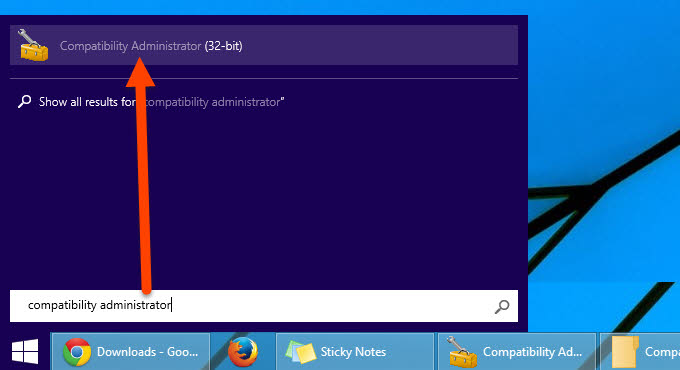
- Download Application Compatibility Toolkit from Microsoft downloads. Install it. Run Compatibility Administrator, a part of the tool. If you are using 64 bit Windows, Run the 64 Bit version of the program.
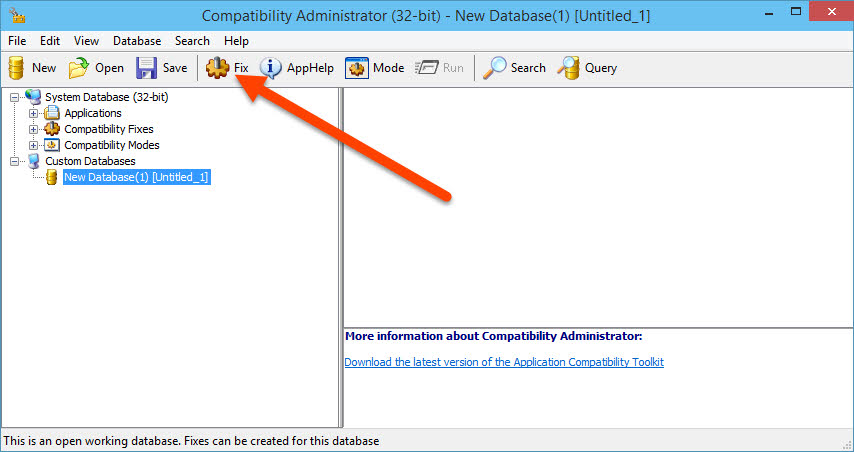
- Click on Fix icon from toolbar to create a new fix.
- Give a name of the program and use Browse to locate the program file location. Go Next.

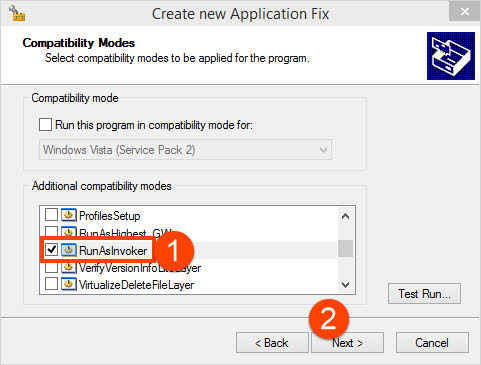
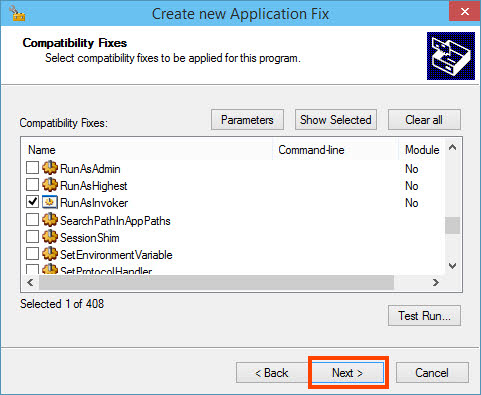
- From Additional compatibility mode list, turn on RunAsInvoker. You can hit Test Run to test the program against UAC. Go Next.
- Again go Next.
- Click Auto-Generate in matching window. Then hit Finish.

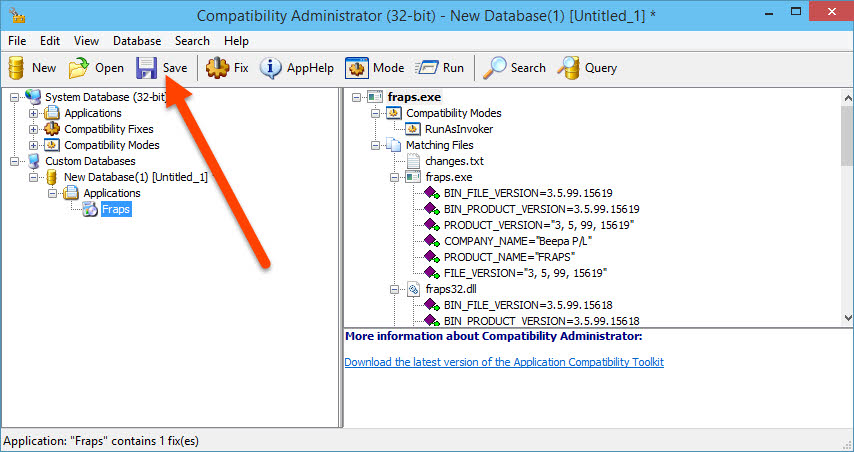
- Now click on Save button to Save database for it.
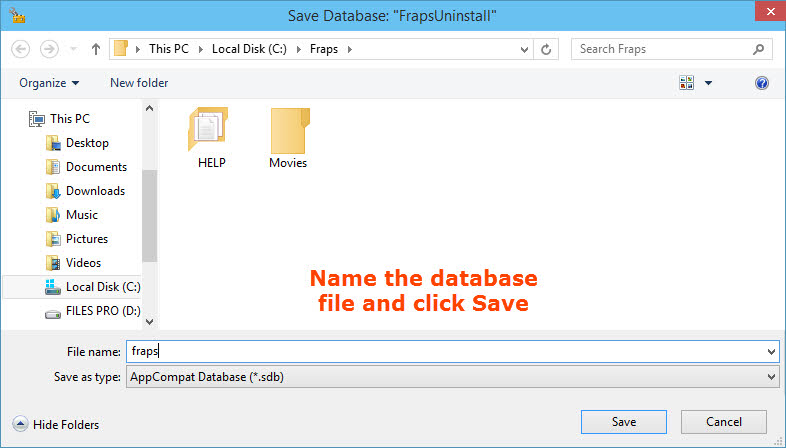
- Give the database a name. As it’s for uninstall purpose from Programs and Features, you can put ‘Uninstall’ keyword too. Hit OK.

- Set a database name and hit Save.
- Now go to File > Install from toolbar to install the database.
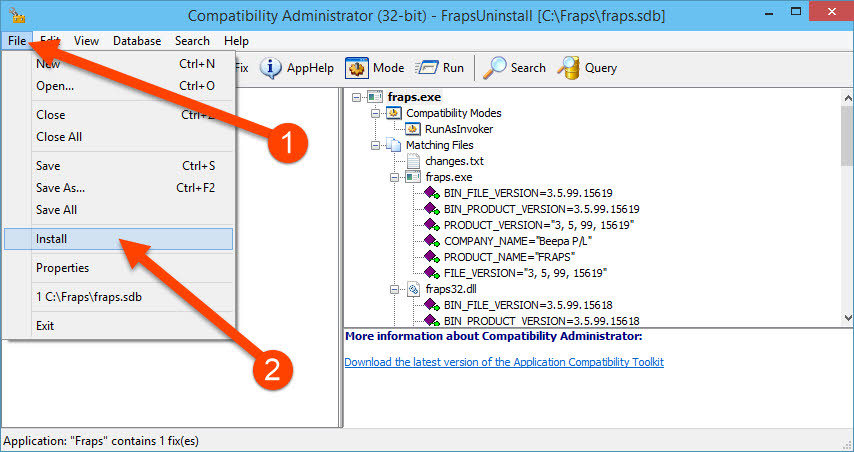
- You are done.
Now the program can be directly run without UAC while not using any shortcut.
Using Third-party Tools
There are several third party tools out there to enable an application to bypass UAC. If you are in need of quicker solution or having problems with above manual processes, you can use any of the following tools:
UAC Pass
With UAC Pass, you can eliminate UAC prompts for selected applications with one or two click. It is a simple portable application that creates shortcut to your specified programs. It automatically white-list the programs by adding them to Task scheduler.
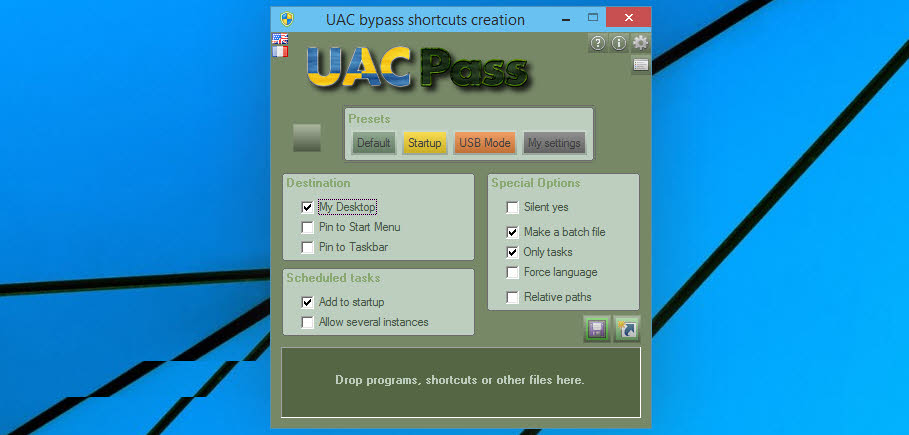
To create shortcut, simply drag and drop the program over UAC Pass. Besides Desktop, you also have option to add to Star Menu, Taskbar and Windows Startup which is really useful. It works on Windows 7, 8 and 10. I tested it on my Windows 10.
Elevated Shortcut
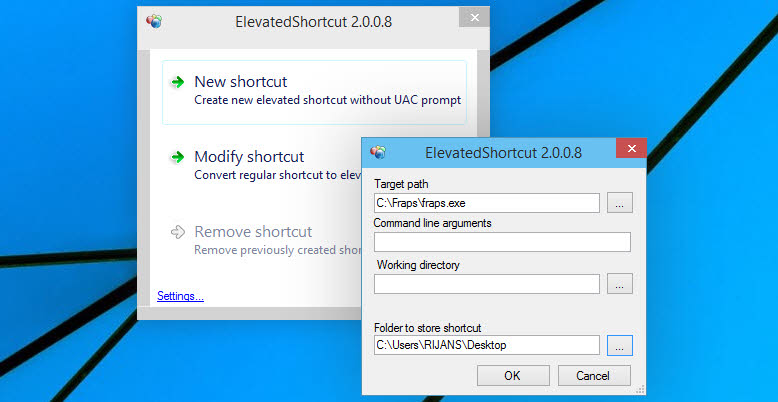
Elevated Shortcut, developed by WinAero, is another similar portable application the makes you run a program with privilege elevated shortcut. This works the same way as UAC pass works.
Note: If you run a program using “Run as administrator” from right-click context menu, UAC prompt will still appear.
Whatever your purpose is, you can now disable UAC (User Account Control) for individual applications without turning off global UAC at all.
Author: Jaber Al Nahian
Jaber is a Programmer and Tech Enthusiast Geek from Dhaka, Bangladesh. He is the founder and Chief-Editor of TechGainer. While he is away from his keyboard, either he's fishing or messing with wildlife. In case, you can contact him at rijans[at]techgainer[dot]com.